
How to Equalize for Freediving — Frenzel Technique Step by Step
Why Freedivers Need to Equalize
As you descend, water pressure increases and affects the air spaces in your ears and sinuses. Without equalisation, the pressure difference causes pain and eventually damage. Scuba divers use the Valsalva manoeuvre — it works at slow speeds but fails at the speeds freedivers descend. Freedivers use the Frenzel technique.
The Frenzel Technique — Step by Step
Step 1 — Understand the anatomy
Place two fingers gently on your throat just above the Adam’s apple. Swallow. Feel the muscles moving. These are the muscles involved in Frenzel equalisation.
Step 2 — The 'K' sound
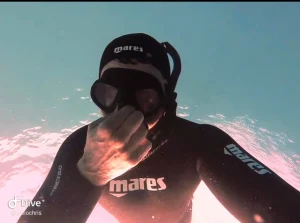
Pinch your nose. Try to make the sound ‘K’ — but do not let any air out. Feel the back of your tongue rise and compress air in the back of your throat.
Step 3 — Direct the air
With nose pinched and glottis closed, make the ‘K’ movement. The compressed air pushes into your Eustachian tubes and you will feel your ears pop.
Step 4 — Practise out of water
You can practise anywhere, any time. Ten minutes of dry practice per day builds muscle memory faster than any in-water session. Most students learn it within a few days.
Step 5 — Apply it underwater
Equalise before you feel any pain — ideally every 1–2 metres of descent. If you wait until you feel pressure, you are already behind.
Common Mistakes Equalizing
- Waiting too long — always equalise before you feel pain
- Trying to use Valsalva at depth — it stops working and can cause injury
- Tensing up — relaxation makes equalisation easier
- Descending feet-first — always descend head-first
What if I Cannot Equalise?
Some people find Frenzel very easy. Others take weeks. If you cannot equalise on your first session, we simply work at shallower depths until the technique clicks. There is no rush.
Equalisation is a skill, not a talent. With the right technique and consistent practice, almost everyone can learn to equalise comfortably for recreational freediving depths.

